
Sometimes photographers encounter light conditions that appear very dramatic to our eyes, but cameras don't have a brain as genious as ours to compensate for strong light
discrepancies or high contrast light conditions. This can be overcome by applying the HDR technique. It works as follows: shoot 3 images of the subject with different exposure settings. A rule of thumb says:
'change the shutter speed by at least 2 steps up and/or down'. You can either change the f-stop or the shutter speed. Changing the f-stop may be adequate when there is plenty of light,
but in outdoors photography with limited light conditions this does often not reveal satisfactory results as the depth of field would be influnenced. Hence one better opts for changing the shutter speed
instead. Try at least 3 different settings and make your series of shots with the camrea mounted on a tripod to avoid any movement of the camera. Here is one fine example of applying the High Dynamic Range technique by taking 3 shots with different shutter speeds.
(an advanced workflow is described in detail in the document Advanced High Dynamic Range (HDR) Workflow applied in Photoshop).
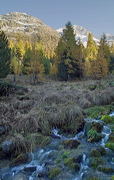
| High Dynamic Range (HDR) applied. The combined result of the 3 differently exposed images |
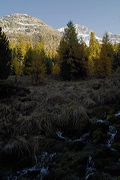
Exposure for high-lit area: 1/125 f:5.6 |
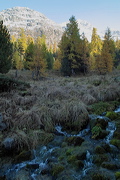
Average Exposure: 1/40 f:5.6 |
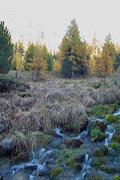
Exposure for low-lit area: 1/10 f:5.6 |
|---|---|---|---|
 |
 |
 |
 |
Later in your digital lightroom use an imaging software capable of working with layers like Photoshop. Select the 3 images of your preference and layer them perfectly on top of eachother.
With the masking and gradient tools you can blend the desired sections of each image into one final image layer revealing an image that is very close to our personal 'brain-corrected'
impression of the site at the time of shooting.
Applying this technique to obtain a high dynamic range will create very satisfactory results when shooting images in high contrast light conditions.
Go out - try it and enjoy your work (after some photoshopping using mask and gradient tools).